Fun With Wilbur, Volume 4
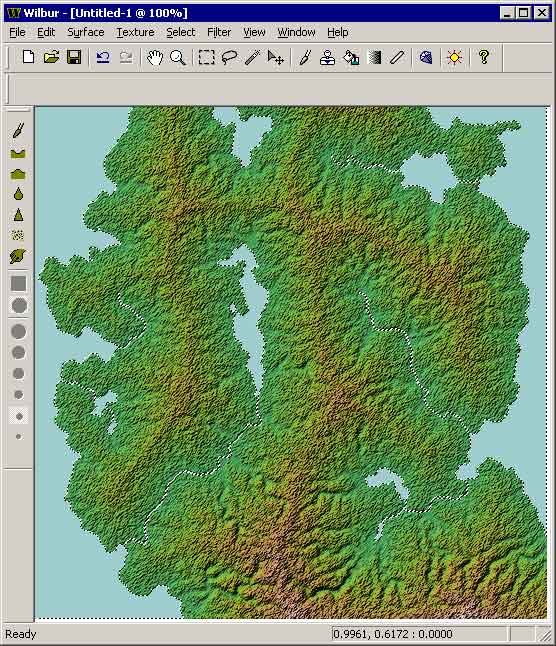
From a black and white outline to a terrain.
Start with a black-and-white coastal thingy.
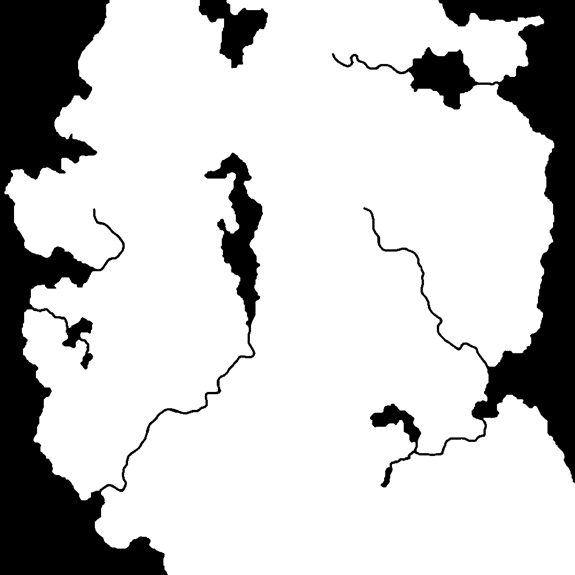
Select>>Load selection to load as selection in Wilbur.
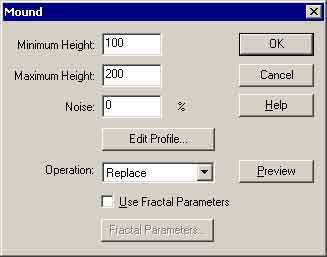
Filter>>Fill>Mound to lay out the basic terrain.
Filter>>Noise>>Percentage Noise with 20% to get rid of the straight lines.
Filter>>Fill>>Fill Basins with value -1 to ensure that all of the little pits are gone.
Filter>>Mathematical>>Offset with -100 to move the base back down to sea level.
Filter>>Height Clip with Min=1 and Max = 100000 to remove specks below sea level.
Filter>>Fill>>Fill Basins with value -1 to ensure connected flow.
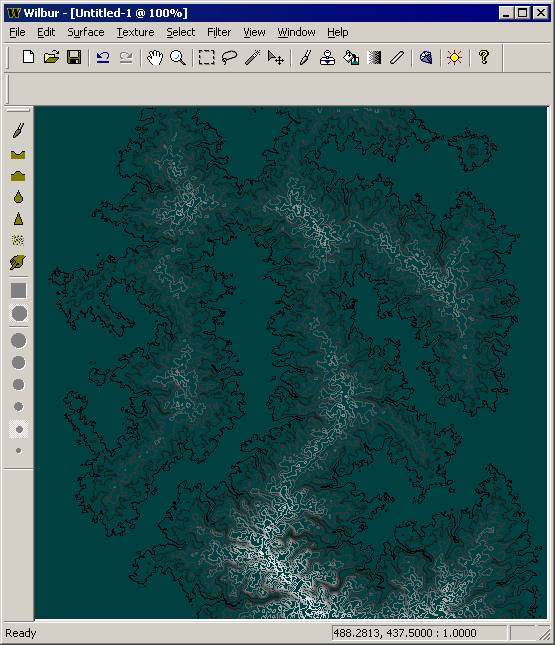
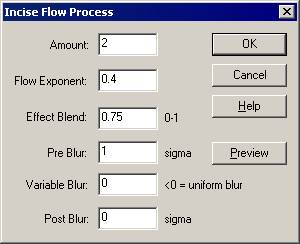
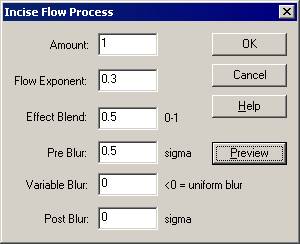
Filter>>Erosion>>Incise Flow as shown to get rough valleys.
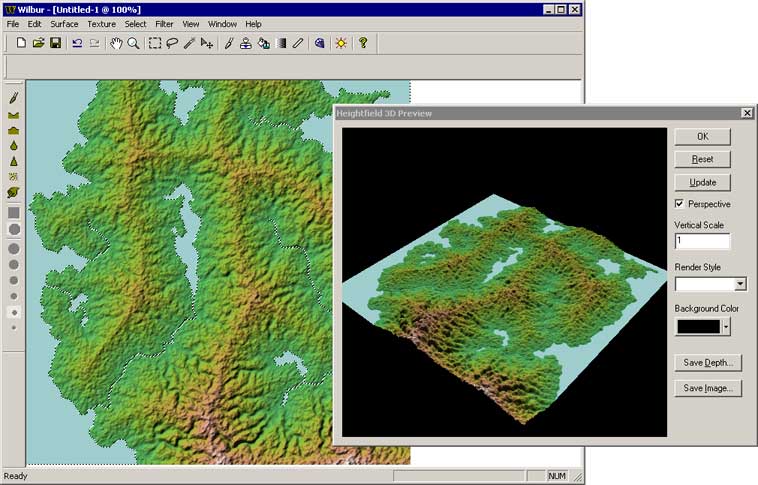
To get a good 3D look at this map we’ll need to make sure that we have a usable horizontal to vertical ratio.
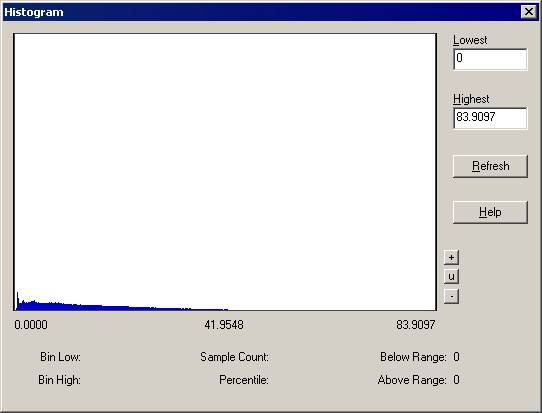
Examine the vertical distribution using Window>>Histogram. In this case the highest point on the terrain is 84ish.
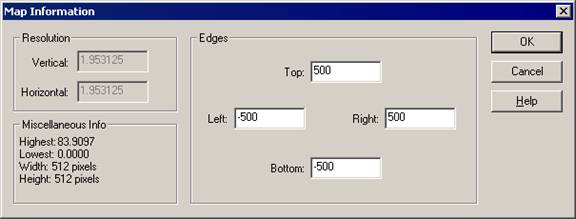
Set the horizontal span of the map using Surface>>Map Info. A good range is -5*height to +5*height in both direction. Because it’s only approximate we’ll go +/- 500 extents.
Window>>3D Preview Window will show a 3D view.

Filter>>Blur>>Gaussian Blur with around 0.5 for the sigma to smooth the spiky bits.
Filter>>Blur>>Gaussian Blur with around 0.5 for the sigma to smooth the spiky bits.
Filter>>Blur>>Gaussian Blur with around 0.5 for the sigma to smooth the spiky bits.
Doing this three times with a small blur instead of once with a larger blur ensures that the profile will approach a Gaussian (the basic Gaussian blur in Wilbur isn’t perfectly Gaussian).
Filter>>Fill>>Fill Basins with value -1 to ensure connected flow.
Filter>>Erosion>>Incise Flow as shown to get the fine valleys.

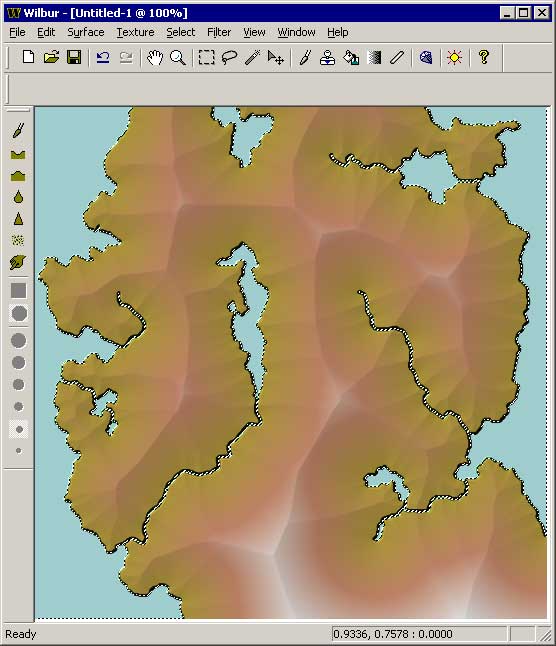
Filter>>Mathematical>>Span with Low=1 and High=100 to span a good range.
Texture>>Contour Shader to get a nice contour-type display.